Reading time: 13 minutes
The Battle of Brallos Pass was a hectic, one-day battle on 24th April, 1941, fought on the Greek mainland, just under 200 kilometres northwest of Athens. Its goal was to delay the German advance long enough to evacuate all British and imperial troops from Greece. It was successful in this, and caused a fair bit of damage to the invaders in the process.
Going to Thermopylae
Ever since the Germans had invaded Greece to relieve their Italian allies, they had been winning. Even with British help, mainly in the form of Anzac troops, the Greeks were simply outmatched. As the Greek government and army crumbled, the Commonwealth forces found themselves more or less alone, forced to figure out a way out of Greece without it turning into another Dunkirk.

The plan British high command came up with was to delay the German advance, making use of the mountainous terrain that makes up the spine of the Greek mainland. All the heavy materiel and the bulk of the troops would rush down to Athens and the beaches of the Peloponnese to be picked up there and then be ferried over to places like Crete, Cyprus, Egypt or the Levant, ready to fight another day.
Left to stem the German tide were some Australian and New Zealand battalions, who would have to do a lot with very little. On April 17th and 18th, a few hundred troops held out against a full brigade of armour in the battle of Pinios Gorge, but eventually had to retreat along the road to Larisa, a large town in the centre of Greece.
From Larisa, the plan was to go down further south through the town of Lamia and set up a defensive position at Thermopylae, more or less at the same site that Leonidas and his three hundred Spartans had held off the Persian hordes some 2,500 years before.
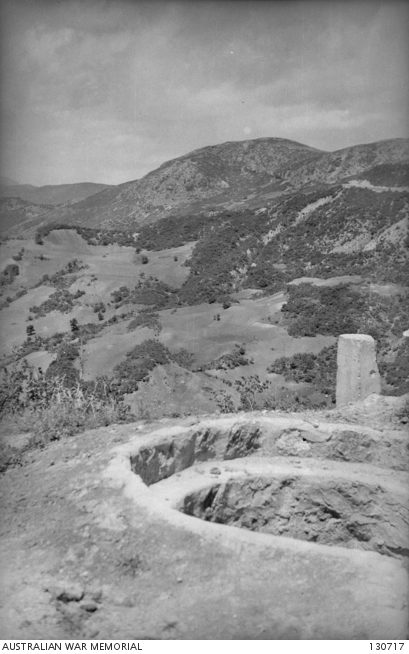
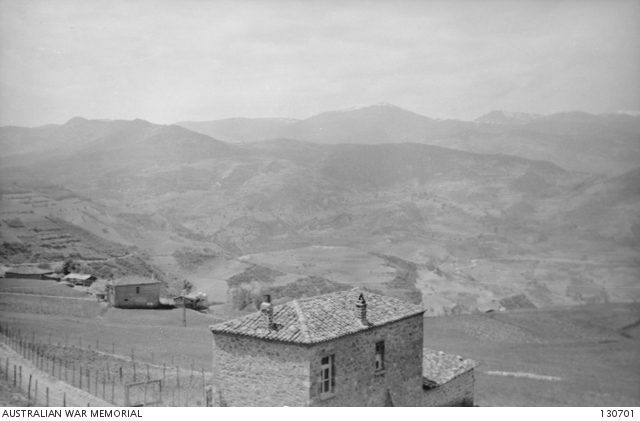
Thermopylae is a defender’s dream as it’s the place where a 1200 metre escarpment rises out of the central Greek plain, forming a natural barrier between it and Attica, the region encompassing Athens. To even get to the mountains you first need to cross the Asopos and Sperchios rivers, then the only way over them there are only a few passes. Thermopylae is one, and the Brallos Pass to the south is another.
The main part of the Allied force had made its way through the passes thanks to the delay the Germans suffered at the Pinios Gorge, but this advantage had to be capitalised on. Thermopylae itself would be held by a New Zealand division, while the Australian 19th Brigade would hold Brallos Pass.
‘Here we bloody well are, here we bloody well stay’
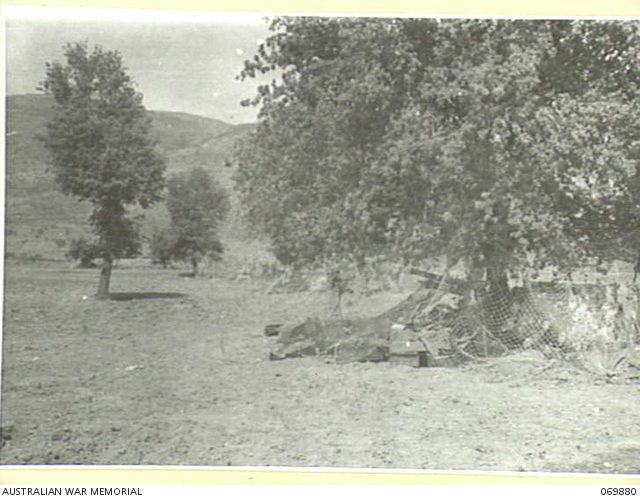
In command of the 19th was Brigadier Vasey, who on arrival in Brallos reportedly said that “here we bloody well are, here we bloody well stay.” Putting action behind these words, he set up two field guns on the crest of the escarpment, giving them a beautiful view of the valley and making easy pickings of the approaching enemy.
Vasey’s infantry took up strategic positions on the escarpment as well as in the village of Brallos itself (the 2/2nd Field Regiment), and surrounding villages. Most important were the hamlet of Skamnos, just north of Brallos in the centre of the pass, where the 2/11th Battalion took up a position, and Gravia, south of Brallos, defended by the 2/1st Battalion.
When the Germans would enter the Brallos Pass they would have to overcome two entrenched positions, while the Gravia and escarpment positions would defend against any flanking manoeuvres. Still, all anybody could hope for was to hold out for a day and pray that was enough for the main force to withdraw. The Germans simply had too much firepower for anything beyond that.
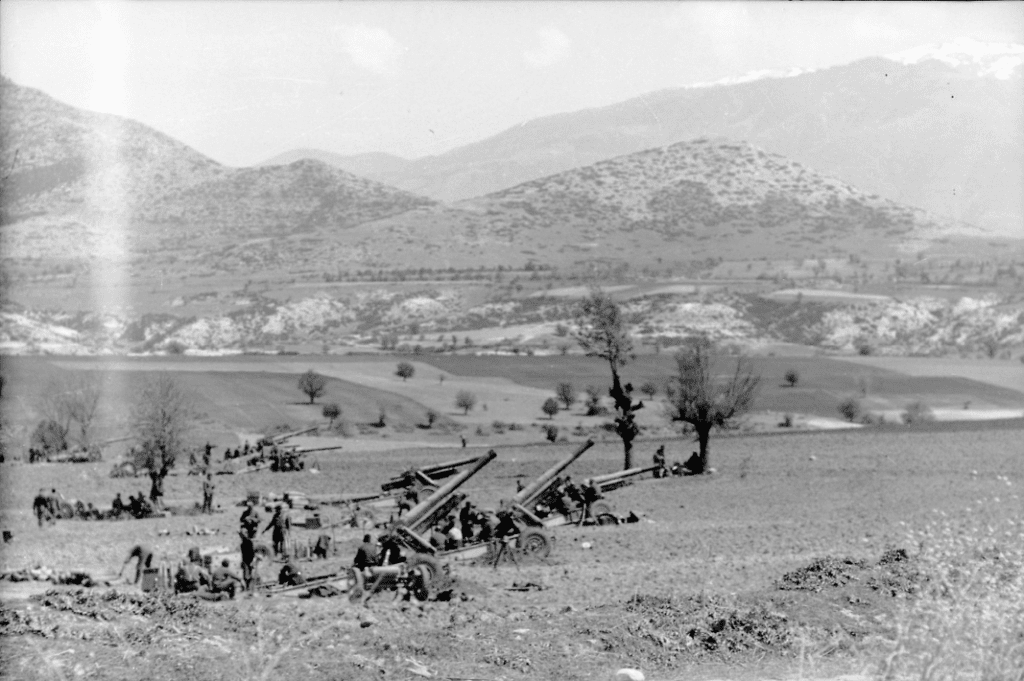
Big guns
The main trump card for the Allies was artillery. As the main force had retreated, sappers had blown the bridges over the Sperchios and Asopos. To cross, the Germans were forced to use pontoons in full view of the two Australian field guns and their excellent position.
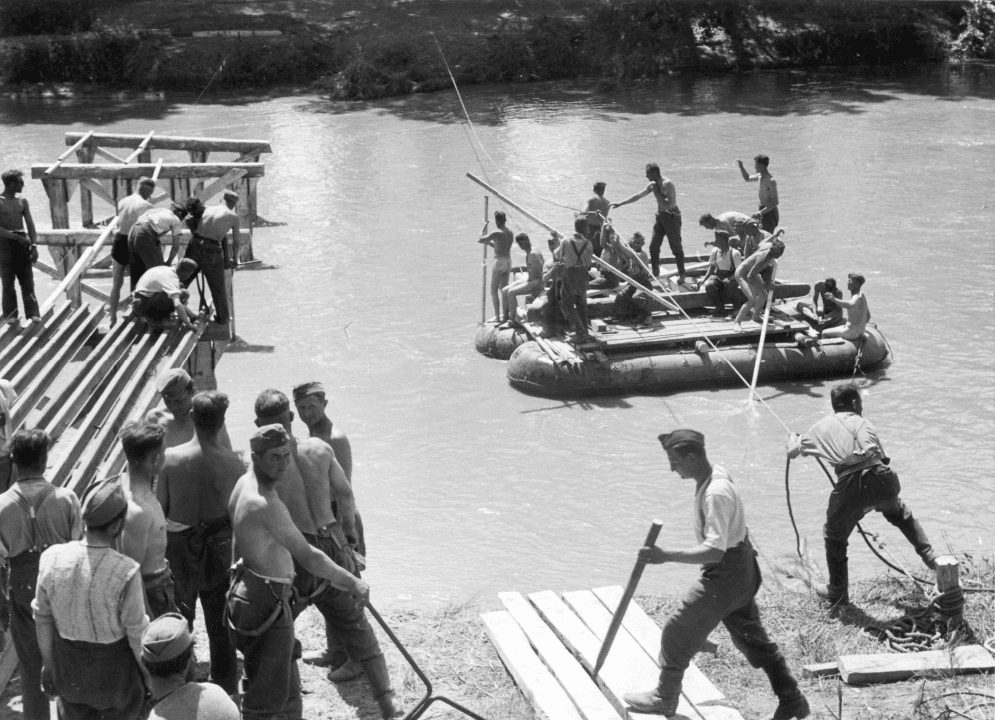
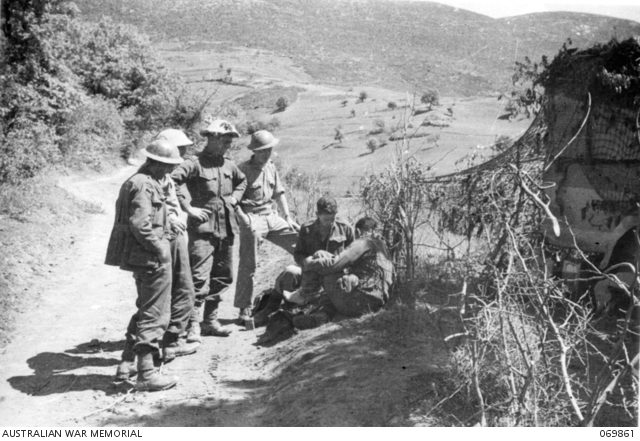
One Australian soldier, Maxwell Oliver, describes the pontoons as one tank going into the river and popping its top to let other tanks go over. As impressive as this was, it made for easy shooting for the guns.
Naturally, the Germans did all they could to unseat the troops who were using their tanks for target practice. In the end, according to one account, 160 shells were fired at the Australian position over the course of eight hours on the 23rd. According to another veteran, Norman Johnstone, there wasn’t much the Australians could do as the German guns outranged the British 25-pounders.
Eventually this onslaught led to first one gun and then another being taken out of action. Special mention should go to Lieutenant John Richard Anderson. He was in charge of one of the guns and he and his men held out for 31 hours under heavy fire, until all of them had been either killed or wounded. He then took one of the men to safety under heavy fire, before returning to the position and firing the gun by himself until the other wounded had made it to safety. He received a Military Cross for his conduct.
At Brallos on 23rd April, despite intense fire from an enemy medium battery, he commanded his two forward guns with such accuracy that the German advance across the plain leading to Brallos was held up for 31 hours. When finally his guns were shelled out and the personnel killed or wounded he took one of the wounded men up the hill to safety under observed enemy fire. He then returned to the gun position, and as our own ammunition was exploding he sent the wounded troops to cover and fired the gun for some time afterwards. When the gun was finally damaged by enemy fire he personally removed the sights and brought them back.
Military Cross Citation for Lieutenant John Anderson
Anderson wasn’t the only Australian soldier to receive an award for his conduct during the gun duel. Gunner Eric Stanislaus Brown took one of his wounded mates to safety during a particularly intense part of the battle. He also managed to salvage some equipment before being forced to abandon his post.
By the time the Germans finally managed to take the pass, they had lost up to 15 tanks and an unknown number of troops, not to mention other materiel, to just two guns. Losses were so bad that even after the guns had been destroyed, the Germans sent out the Luftwaffe to plaster the position, with as many as 50 planes bombing the mountaintop.
The battle for the pass begins
As the next day dawned without the threat of Allied artillery, the German commander, Lieutenant General Fehn, ordered a ground attack on the Brallos Pass. The first part of his plan was to send the 8th Reconnaissance Battalion of the 3rd Company to scout along the main road between Lamia and Athens.
The plan seems to have been to get more information on some forward defences that had been spotted the day before. However, all troops except for Vasey’s brigade had already withdrawn during the night. This meant only the few positions within the pass itself were still under Allied control; Brallos was all that stood between the Germans and the retreating troops.
Fehn sent two units of the 55th Motorcycle Battalion. The first entered the ravine at dawn and had a rough time getting through. Not only did the ascent work against them, but so did the route itself, which at the time was a path worn out by pack animals and humans, not tires. As that motorcycle troop struggled, the other went over the northward route along the coast in a bid to outflank the Australians.
At 11:30 the first section made it through the ravine and were almost immediately spotted and pinned down by the troops in Skamnos. As they had been forced to leave their heavy weapons behind to cross the river, they had no way to retaliate against the barrages of Australian artillery, meaning they were forced to keep their heads down with nowhere to go.
Despite this, Fehn tried to push hard on this position and ordered his artillery to bombard the position – one veteran Keith Bennett describes being shelled constantly and even suffered hearing loss because of it – but it didn’t do much good in the narrow confines of the pass. Fehn also sent two infantry battalions, but they were also quickly pinned down, with one Australian artillery officer later remarking “the Hun gave us great targets by his methods of mass murdering his troops.”
This stalemate necessitated a change in tactics, and a new flanking manoeuvre was initiated, this one along the western side. Though they faced heavy fire, these two arms embracing the Australian positions were able to finally exert pressure. The first to retreat were the eastern units, who after about an hour’s fighting were ordered to retreat at 18:30 by Vasey. There were simply too many Germans and not enough ammunition.
As these units and those in the other villages fell back, the units to the south in Gravia felt the pressure from the second arm. However, as giving up these positions would mean almost certain encirclement, Vasey ordered them to stay put until all other units were able to retreat. Under heavy fire, this battalion held out until 21:00. When the order to withdraw was given, the Germans, exhausted after a long, hard day, let them go without a fight.
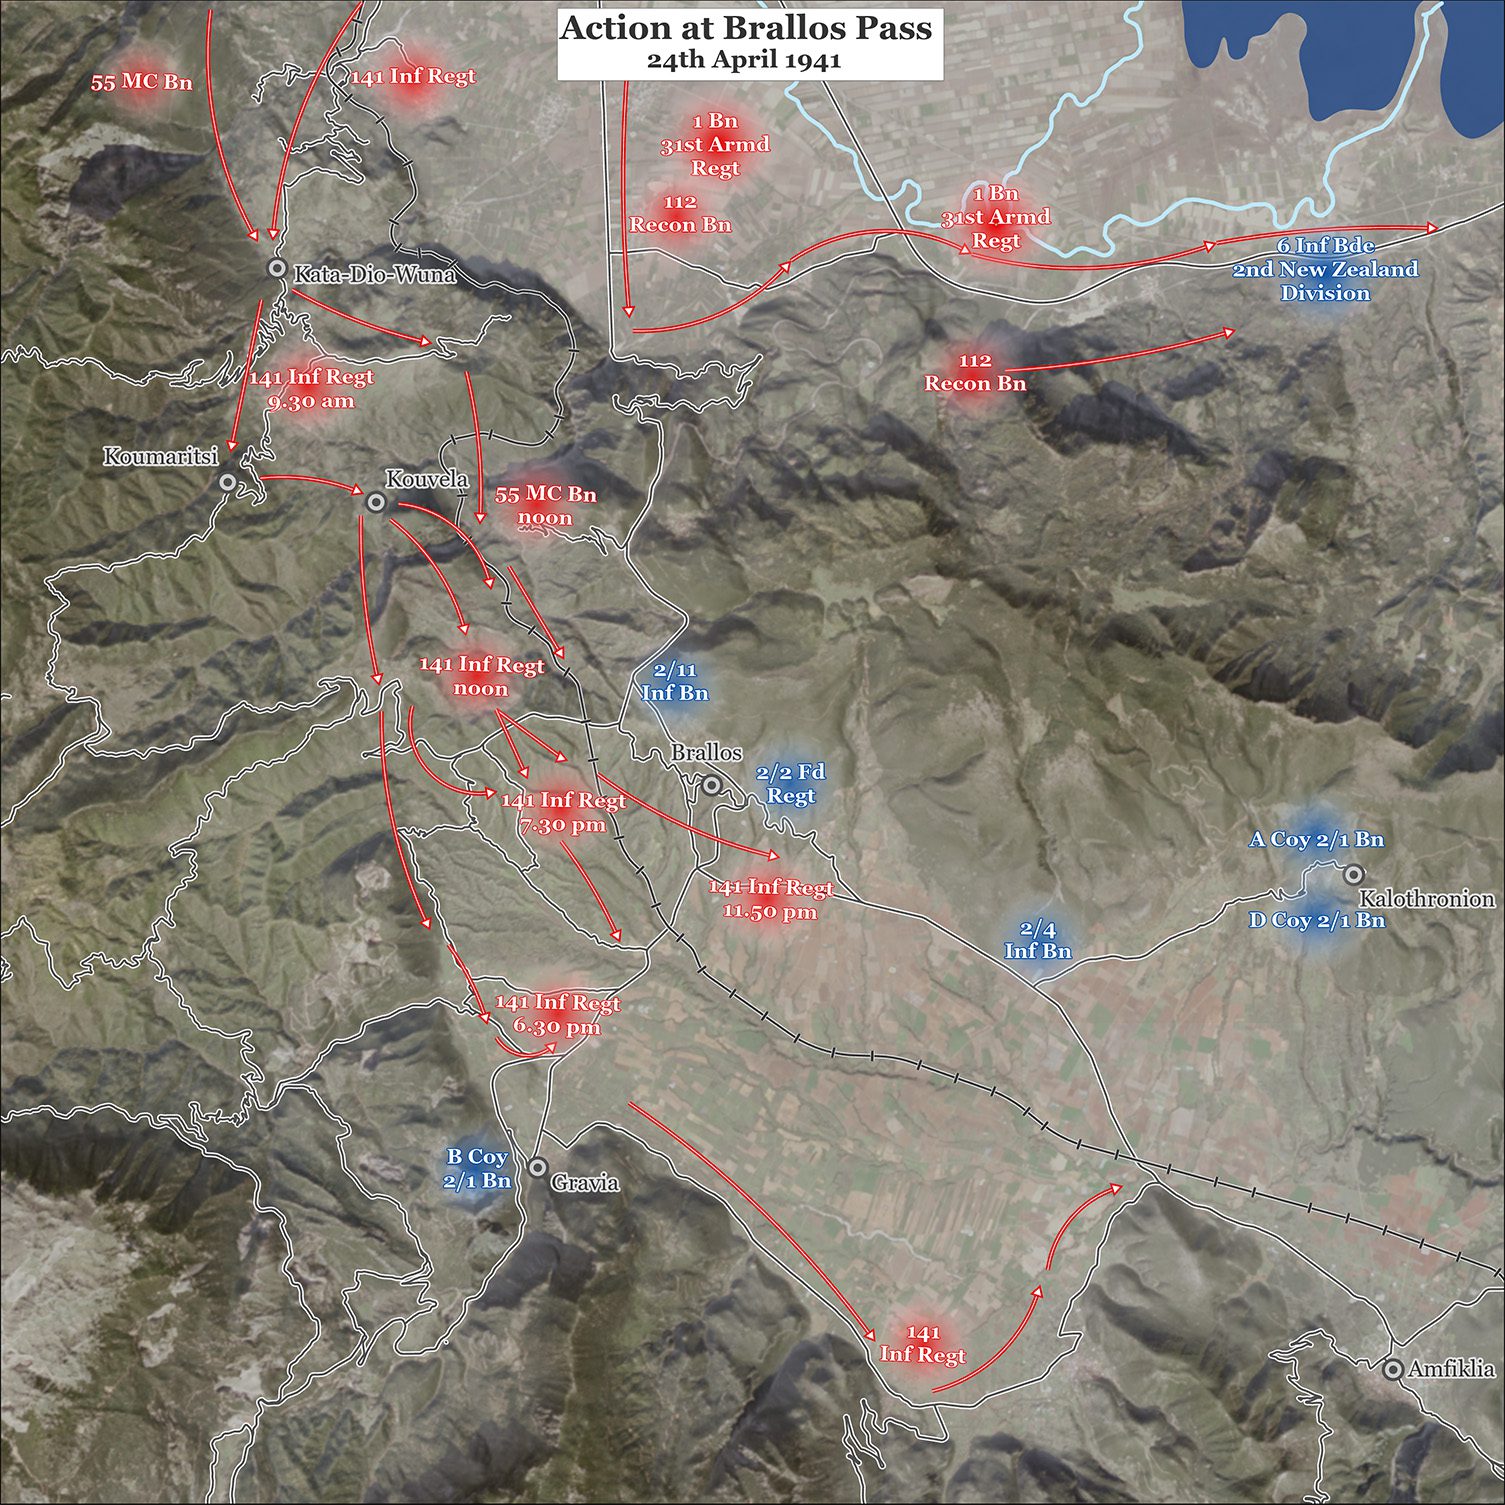
Terry Fairbairn describes holding out to the very last minute, and then scrambling for a truck that was waiting to take him and his mates south. In his words, “we had no option but to get away and get the hell out of the place.” The map below shows the complexity of the Australian withdrawal while in contact with the enemy.

New Zealand battles on
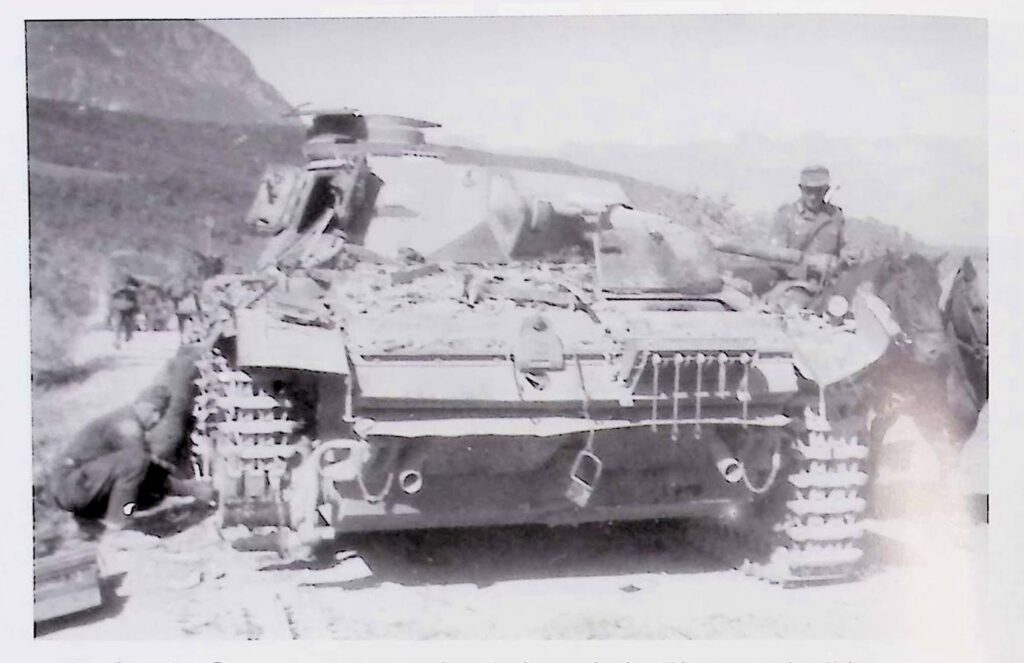
As all this was going on, the New Zealanders to the north of Brallos were fighting a modern battle of Thermopylae. As the motorcycle troops set out against the Australians, a tank company, supported by infantry, was sent to assault the Thermopylae pass, with orders to take the town of Molos, a few miles down the road. This was part of the plan to encircle the Australians, but the Germans hadn’t reckoned on meeting a brigade of determined Kiwis.
The Germans had picked a bad place to meet them, too: the Molos road runs between the escarpment to the south and marshes to the north, which eventually lead to the sea. The tanks couldn’t go over the mountains, and would have gotten stuck in the marshes, forcing them to go down the road; there was no possibility of encircling the New Zealand positions.
Sending tanks more or less single file down a road without cover is asking for trouble, and the New Zealanders were happy to comply. Their three 25-pounder field guns and an entire anti-tank battery took aim and fired at the German screening forces around 14:00, knocking out several tanks in the opening salvo.
The German commander decided that the only course of action was to press on, so he did. He threw all he had at the defensive lines and through sheer force of numbers was able to inch forward. Once they were close enough, his infantry attempted a flanking manoeuvre, but they too, were quickly pinned down.
The Germans didn’t let up, but the New Zealanders held on through constant shelling of the tanks and even Luftwaffe sorties. Slowly but surely, though, their lines shrunk as the Germans pressed on. Seeing this as a portent of their victory, the enemy paused the fight to catch their breath around midnight. A new probe was sent around two in the morning, only to find the New Zealanders were gone. They had retreated as per their orders; their shrinking line was due to troops joining the retreat to Athens.
Interactive Map of the Battle of Brallos Pass
Aftermath
The defence of the Brallos and Thermopylae is considered a success by any metric. It managed to hold back the invading Germans long enough to secure the withdrawal of other British and Commonwealth troops without the Anzac units themselves being captured. In the end, they didn’t even suffer many casualties, mainly because the German artillery was less effective than usual in the hilly terrain.
It is worth reflecting on the skilled and determined performance by this group of ANZACs, particularly in comparison to how other Allied forces were faring at this point in the war. They had been in regular combat and continuously moving positions for three weeks. Each of these moves had been a retreat. They were subject to regular air attack by an enemy who had complete air dominance. They had little time to reconnoitre and prepare each defensive position. Yet they still fought these determined and experienced German troops to a standstill, then disengaged and withdrew in good order. This is a dramatically better performance other Allied forces subject to German blitzkrieg during the same period of the war.
The 19th Brigade would eventually rejoin the main force and take ship on a number of beaches across Attica, with most of the men sailing either to Crete or to Egypt. It would be a few years until they would be able to stop fighting.
Australian Units who Fought in the Battle
2/1st Australian Infantry Battalion
2/11th Australian Infantry Battalion
2/1st, 2/2nd and 2/3rd Australian Field Regiments and 2/1st Anti-Tank Regiment
Podcasts about Australians in the Mediterranean during WW2
The text of this article was commissioned by History Guild as part of our work to improve historical literacy. If you would like to reproduce it please get in touch via this form.