Second Battle of El Alamein: Australia Forces a Breach
Reading time: 9 minutes
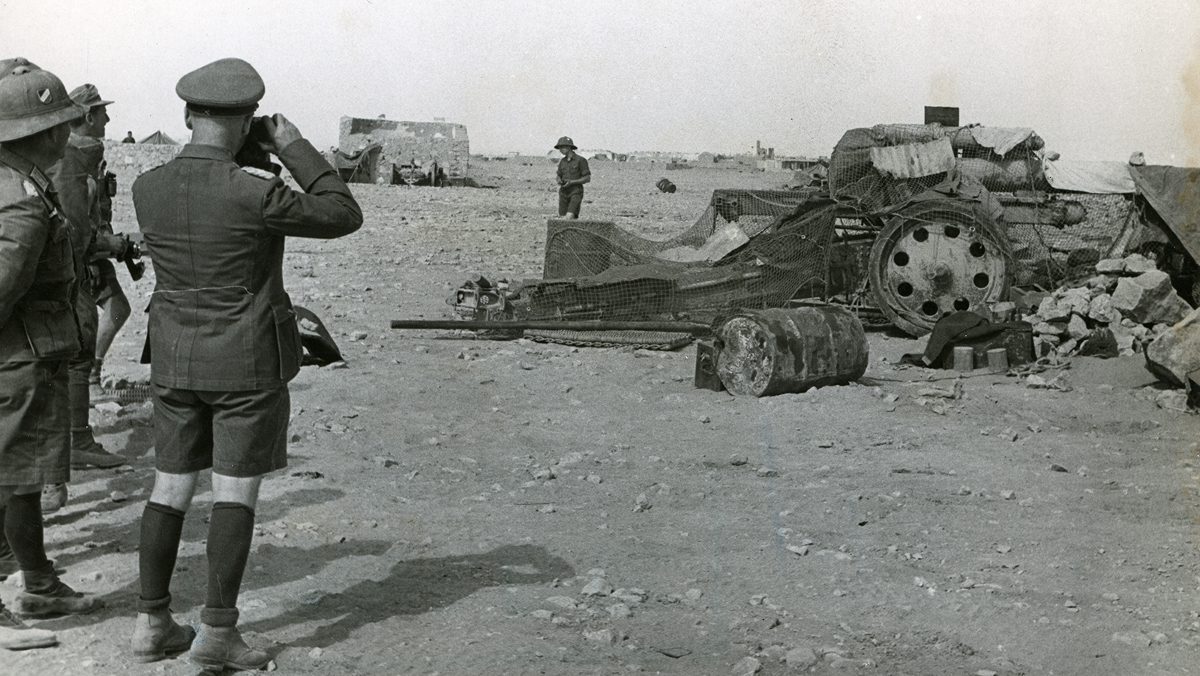
The battle of El Alamein in late 1942 was the turning point for the North African campaign, which saw the fighting rage back and forth between Libya and Egypt. As with most of the battles in the region, Australians played a vital role in the eventual Allied victory. In this article, we go over their experiences during this pivotal battle.
By Fergus O’Sullivan
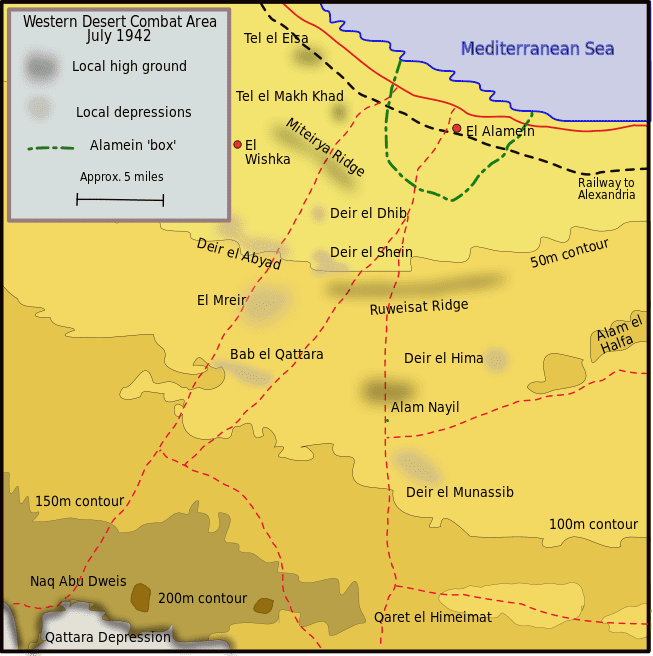
El Alamein was and is a small seaside town a little over 100 kilometers west from Alexandria. It served as the linchpin for the defense of the port at Alexandria, which was the main hub for the Allies in the Eastern Mediterranean, vital for the forces fighting the Germans as well as those protecting Palestine and fighting in Lebanon.
Although of little strategic value itself, it lay near an easily defended escarpment which then transitioned into a large sunken area called the Qattara Depression. This made it so anybody that wanted to take Alexandria from the west would have to go through the gap south of El Alamein or otherwise travel the long way around, through some of the harshest parts of the Sahara.
Changing Horses
British and Commonwealth forces had successfully defended the line in the first battle of El Alamein in July 1942 under the command of Field Marshal Claude Auchinleck. However, British high command were unhappy with Auchinleck and replaced him with Lieutenant-General William “Strafer” Gott. However, before he could take up his post, Gott was killed when the transport plane he was traveling in was shot down. This lead to Lieutenant-General Bernard Montgomery being appointed to command the British 8th Army. This proved an opportune appointment, Montgomery took to the task of defeating Rommel with vigour.
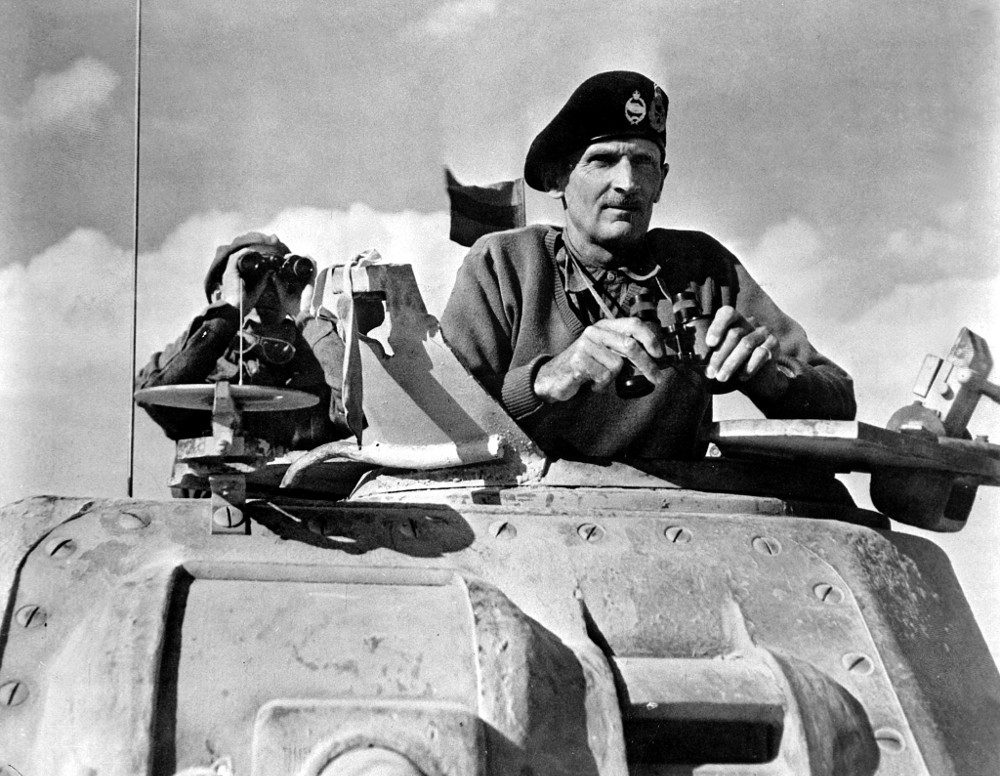
In the words of Raymond Widdows from Moonee Ponds, Victoria (who also was part of the Benghazi handicap), under Auchinleck there was a general feeling like the army “just can’t seem to get it right.” Montgomery’s arrival changed that, though: he gave clear orders which “explained what every unit and every division had to do… and that’s when the morale went up.”
Besides being more clear about what he expected from the men under his command, Montgomery also gave up on the passivity the Eighth Army had known until then. According to Glyndwr Evans, also from Box Hill, Victoria, Montgomery “wanted to get the troops out of thinking defensively, to start thinking in terms of advancing and attacking and not sitting there and just defending.” After all, sitting still will get you nowhere, “to finish the war they had to attack.”
Boxing Clever
One way to change the thinking about how the desert war should be fought was to stop thinking about the “boxes,” the defensive positions established around El Alamein that proved so decisive during the first battle. Montgomery held them in particular disdain as symbols of the defensive mindset.
As such, Mr. Evans says that the new field marshal “prohibited the use of the word box, it was to be deleted from military vocabulary. There was an Australian officer up visiting the troops and he asked where this fellow had come from and he said, ‘Oh we have just come around from such and such a box,’ and he looked at him and said, ‘What’s a box?’ he said, ‘a box is something that a bowler hat comes out of.’” The defensive war was clearly over.
Laying Battle Plans
It wasn’t enough to have the will to fight, of course, Montgomery needed men and equipment to defeat the Germans and their Italian allies. Thankfully, the first battle of El Alamein had bought the British and Commonwealth governments enough time to bring in fresh troops and materiel, meaning the Eighth Army was at peak fighting strength.
The attack was planned for the 23rd of October, 1942, just under three months after the end of the first battle. During that time, the Germans and Italians hadn’t exactly been sitting still. Rommel had ordered the dessert to be mined extensively and plenty of fortifications had been created.
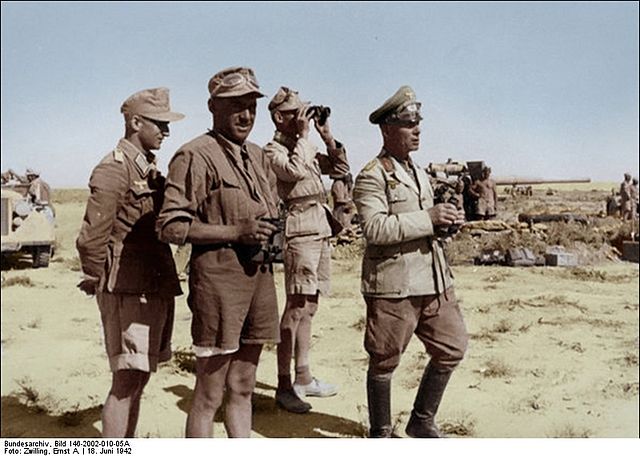
Rommel’s goal was more or less the same as Auchinleck’s a few months before: funnel enemy armor into choke points so as to take away their mobility. It looked like this battle would be fought and won by infantry. Lucky for Montgomery, he had some of the best in the world under his command.
Taking the Initiative
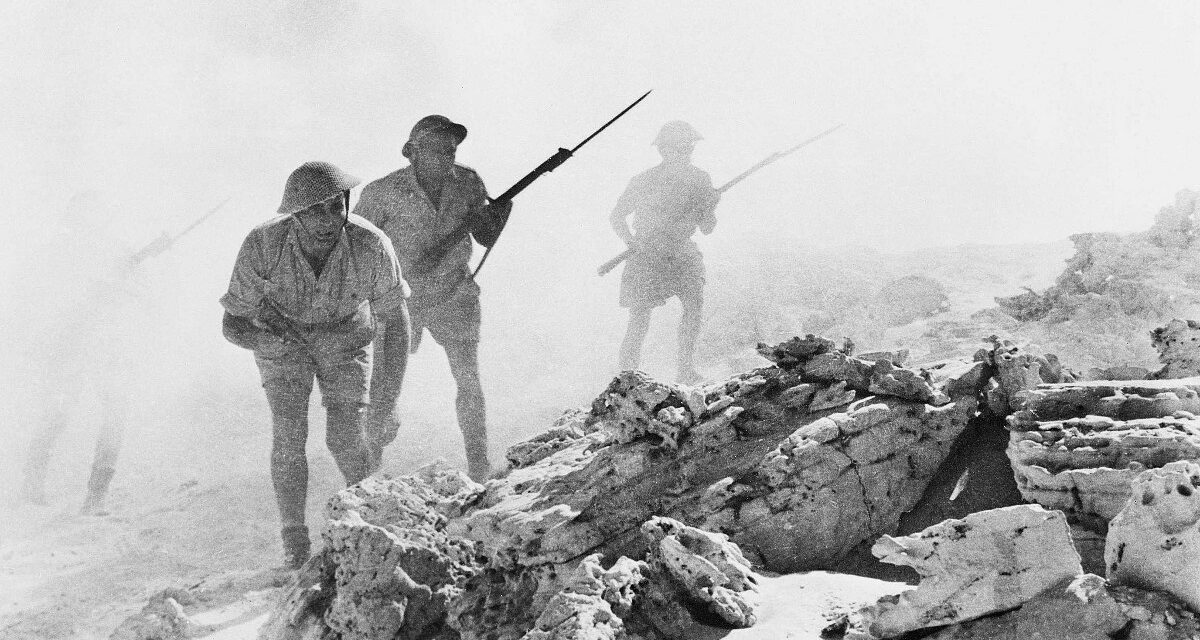
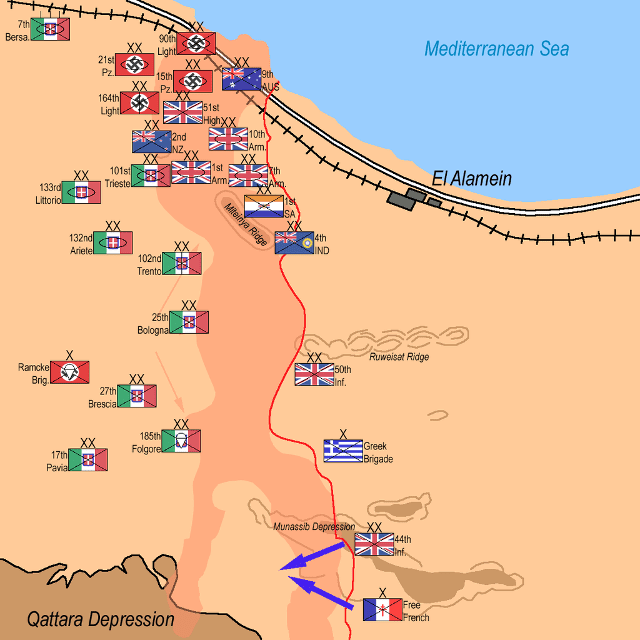
In essence, the Allied plan was simple: assemble superior forces, then push as hard as they could against the Axis defences until they broke through. Montgomery had planned a broad front attack, with a line of troops stretching from the sea to deep in the desert. The 9th Australian 9th Division would take the extreme north of the front.
Infantryman Charles Cutler, who after the war became deputy premier of New South Wales, recalls that the artillery “opened fire at twenty to ten on the night of October 23rd and at ten o’clock the infantry, having come out of its holes a few hundred yards back, had moved up onto the starting line which was represented by a white tape… The infantry lined up… and at ten o’clock on the dot we went over the line, and from there on things started to happen.”
Friendly Fire
However, as Mr. Cutler’s company advanced, things also started to go wrong. The first was that the gun supposed to cover their advance fired what was called a “drop short,” and, according to Mr. Cutler fell “hundred yards short of where it was meant, and unfortunately that dropped right in the middle of our company and our first, I think, five casualties were caused by our own gun.”
These men weren’t the only ones to succumb to friendly fire, either. Mr. Curtler also recalled that the next morning “18 Baltimore bombers came over to drop their first load on the Germans, and one of them again mis-navigated and dropped their bomb load on the 13th Battalion, which suffered about four or five killed in that bombing.”
Despite these mishaps, Mr. Cutler states that his company made it through the first two days, taking objective after objective amid heavy fighting. On the 25th of October, the line halted and they were ordered to get their entrenching tools out and make foxholes. Mr. Cutler and his fellow soldiers were barely done before they saw the reason for the order; tanks bearing down on them.
In Mr. Cutler’s words, “I heard the tanks coming in… and I thought to myself, ‘This little hole’s not real deep and, you know, a… tank running its track alongside this little hole’s not going to do me a great deal of good,’ so I thought I’ll get out and I’ll deepen it a bit. And I got out to deepen it a bit and I’d dug about two shovelfuls of dirt out of it when I got shot.”
Luckily, one of Mr. Cutler’s comrades was able to push him back into the improvised foxhole (“hurt me a bloody sight more than the bullet did”) before getting him to a field hospital after night fell. For him, the battle of El Alamein was over, though Mr. Cutler would go on to serve with distinction in the Pacific theater.
Breaking Through
According to another Australian who was at the battle, Ken Pantlin from Ivanhoe, Victoria, all this hard fighting wasn’t done in vain. In his interview, he says that “if it hadn’t been for the fighting by the Australian battalions on the coast that forced the break-out,” the battle would have been lost.
Rommel’s tactic was, at least to a certain extent, working. The Eighth Army couldn’t get past the mines and other defences put up by the Germans and Italians. The fighting was hard all across the line, but no progress was made, meaning the British armour wasn’t able to break through and wreak havoc, much like Rommel had done to them all those months before.
However, Rommel hadn’t counted on the tenacity of the Australian infantry. Through sheer grit and determination, the 9th Division eventually punched through the German line and a breach was made. After that, in Mr. Pantlin’s words, “the tanks went through and that was it, because it was the Australian 9th Division battalions that did the hard slogging.”
It’s not just Mr. Pantlin claiming so, either: in later years, Montgomery himself said as much. For example, Mr. Cutler recalls one quote from the field marshal: “one of the proudest achievements of my career was to have commanded the 9th Australian Division. I could not have won the battle of El Alamein in twelve days without that magnificent 9th Australian Division.” These thoughts were echoed by Major General Freddie de Guingand, Chief of Staff of Allied forces during D-Day, the Allied invasion of Normandy, who commented “My God, I wish we had the 9th Australian Division with us this morning”.
Without Australian mettle, the battle El Alamein, one of the turning points of WW2, may have turned out very differently.
Podcasts on this topic
Articles you may also like
North Africa in WWII: Total War with Honour?
Reading time: 7 minutes
The North African campaigns during the Second World War have a reputation for being “clean” wars, free from the atrocities we see when studying the Eastern front or the Pacific theatre. However, when we look a little more closely, we can see this romanticized image is a little tarnished in places; we’ll take a look at what the historical record can tell us, as well as some details shared by Australian veterans of the conflict.
First Battle of El Alamein: Australia Holds the Line
Reading time: 9 minutes
The North African campaigns of WW2 were two years of back and forth action across Libya and Egypt, with offensives, counteroffensives and sieges throughout and Australians in the thick of it. When the end eventually came to this seesaw action at El Alamein in 1942, again it was Australians who held the day; in this article we’ll see this pivotal battle through their eyes.
The Benghazi Handicap and the Siege of Tobruk
The Benghazi handicap is the name Australian soldiers gave to their race to stay ahead of the German Afrika Korps in Libya, 1941. They won the race, but the reward was just to be besieged in the city of Tobruk for 241 days, the longest siege in British military history. In this article, we use the words of veterans themselves to describe these events, and how the Rats of Tobruk experienced the siege.
This project commemorating the service by Victorians in the Mediterranean theatre of WW2 was supported by the Victorian Government and the Victorian Veterans Council. Sign up to the newsletter at the bottom of the page to be notified when the next article in this project is released.
The text of this article was commissioned by History Guild as part of our work to improve historical literacy. If you would like to reproduce it please get in touch via this form.