FIRST BATTLE OF EL ALAMEIN: AUSTRALIA HOLDS THE LINE
Reading time: 10 minutes
The North African campaigns of WW2 were two years of back and forth action across Libya and Egypt, with offensives, counteroffensives and sieges throughout and Australians in the thick of it. When the end eventually came to this seesaw action at El Alamein in 1942, again it was Australians were integral to carrying the day. In this article we’ll see this pivotal battle through their eyes.
By Fergus O’Sullivan
The battle at El Alamein, a small seaside town a little over 100 kilometres west from Alexandria, is often held up as one of the most important turning points of the war — Churchill hailed the victory in November 1942 as the “end of the beginning.” What is often glossed over in most popular history books, though, is that there were in fact two battles at El Alamein. The second one is the famous one, but it wouldn’t have been possible without the first.
Australians were front and centre for both battles, and distinguished themselves with their bravery and tenacity. We’ll go over how they experienced the first battle in this article — using the hard work of the researchers at the Australians at War Film Archive — and talk about the follow-up in our piece about the second battle of El Alamein.
The First Battle of El Alamein
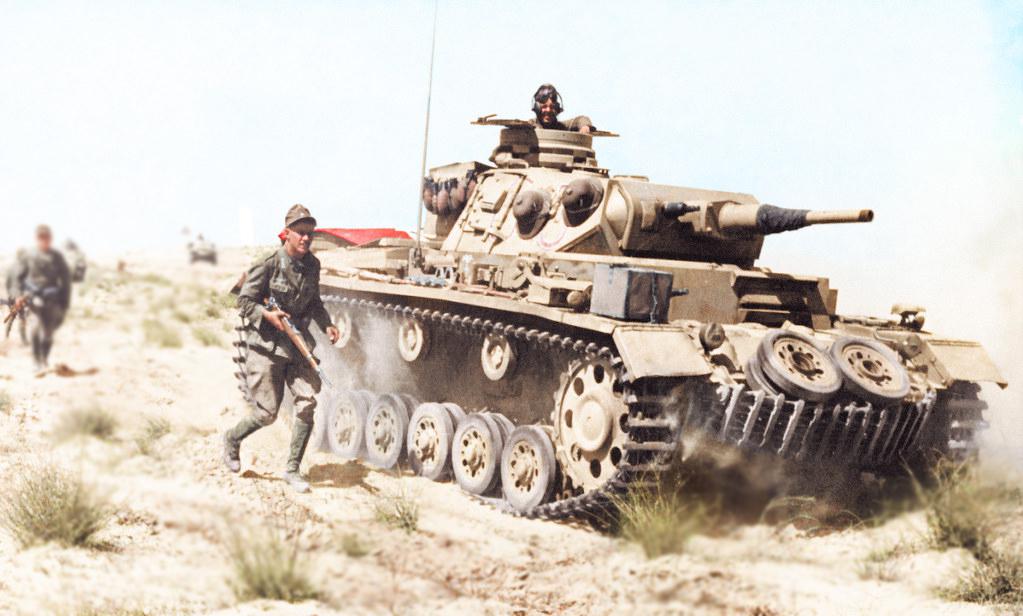
The second battle of El Alamein was the first attack in a long push that would eventually see the German Afrika Korps, under command of field marshal Erwin Rommel, and their Italian allies driven out of North Africa. The first battle seems less dramatic at first, as it was a defensive fight to keep the Axis forces out of Egypt.
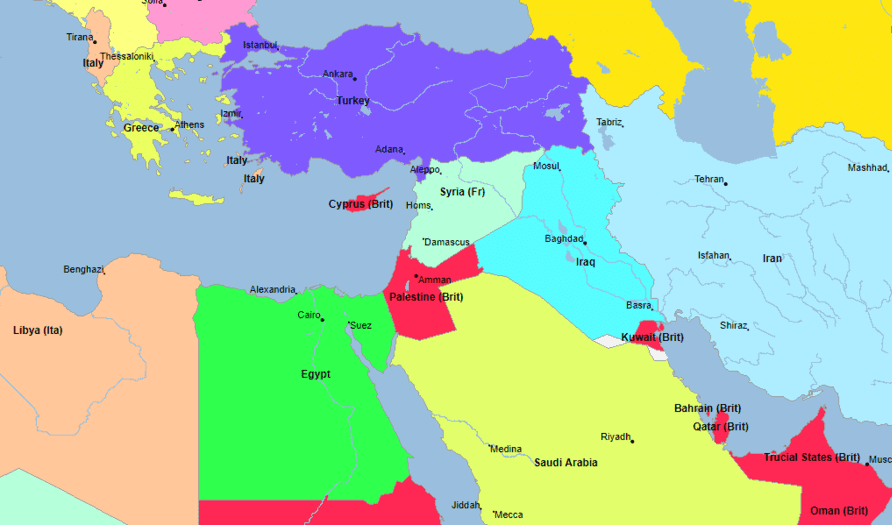
Appearances are deceiving, though: had the British Eighth Army given way and Egypt fallen, there would have been little hope for the Allies in North Africa as Egypt was the main supply depot for British forces in North Africa and the Middle East. It would also have allowed the Germans to march straight through to Palestine and the oil-rich territories beyond.
Clearly, the stakes were high, something that comes across in most of the interviews conducted with Australian veterans who fought at El Alamein. In the words of to Pat Toovey from Tenterden, West Australia, a loss “probably would have increased the time of the war by another year or two and might have cost another million lives. So stopping them at Alamein was very, very important.”
A Different Kind of Fight
Many of the veterans interviewed were veterans of the siege of Tobruk and were hardened fighters — some had even been at Tobruk, then gone on to fight in Lebanon before shipping back to Egypt. The fighting was very different from that of Tobruk, though, much more back and forth than the stagnant trenches of an encircled city.
In the words of Larry Maddison from Malvern, Victoria: “It was the same terrain [as Tobruk]. We were closer to the sea this time, but it was fluid. You could go back if you wanted to. We weren’t surrounded. We had him in front of us on one side. You could get out, not like Tobruk where you couldn’t get out. […] We were advancing a fair bit and coming back.”
Not being surrounded and having a much broader front to fight changed tactics drastically. According to Doug MacLean, from Babinda, Queensland, the front was about sixty miles along in some places, and the month of July was spent fending off small attacks by the Germans, probing for weaknesses. According to him, it was a “savage position.”
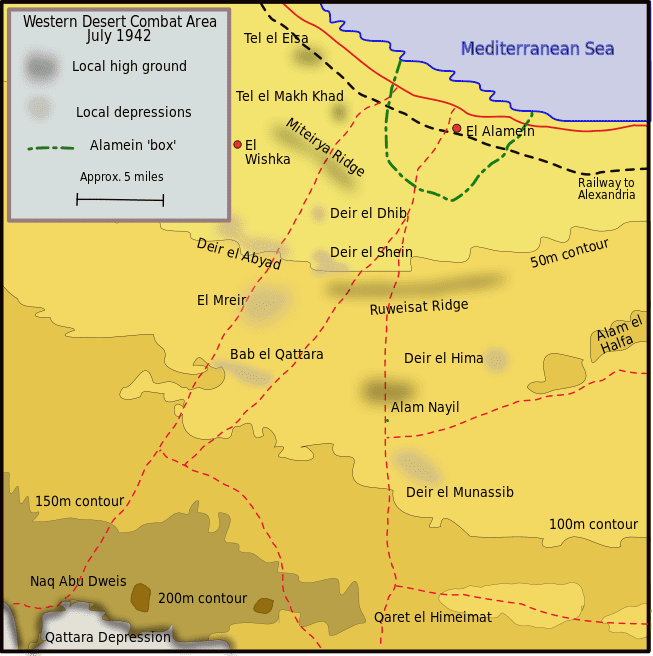
Boxed In
What made it so savage was that the Allied commander, Field Marshal Claude Auchinleck, was focusing his defences around a series of “boxes,” entrenched positions that spread south from El Alamein. These boxes served as linchpins between which there wasn’t much more than sand.
The idea behind this strategy was to use the terrain against the Germans: either they could go through the defences spun between the boxes, or they could detour all the way around them. That wasn’t much of an option, though, as it would mean traveling through the Qattara Depression, a large region full of sand and salt, impossible to maneuver in and one of the hottest places on earth, to boot.
As a result, Rommel had no choice but to go through El Alamein. On top of that, he knew that the Commonwealth forces were slowly gaining strength, while he had scant chance of reinforcement. As such, he knew he had to force a breakthrough, and quick.
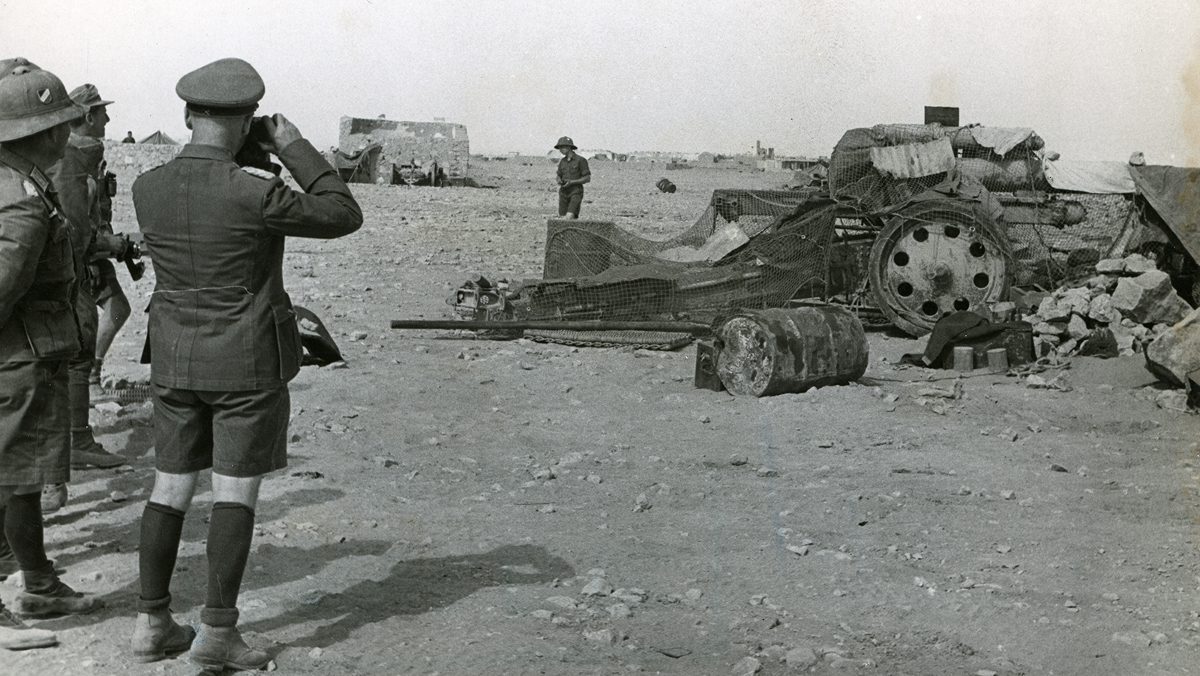
Fighting at El Alamein
Rommel’s need to get through and Auchinleck’s defensive posture made for a battle in which the Germans and Italians would test out different parts of the defenses and the Allies would defend. Counterattacks were generally limited to retaking lost positions, not trying to push back the attacker the way he came. For now, at least, the Allied strategy was to stick to their boxes.
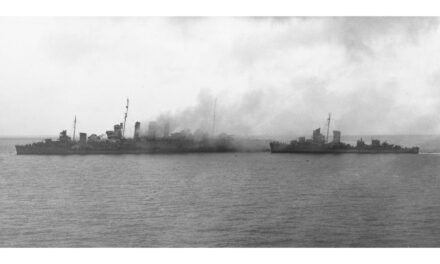
Ships of the Desert
Still, though, there was plenty of movement between the boxes: it’s not like the Allies had enough soldiers to completely block every inch of ground. As such, the fighting even took on some characteristics of naval combat, as explained by Bill Rudd from Melbourne. Bill Rudd has a fascinating background, after qualifying as a Geologist at Melbourne University he was on his way to Bonn University, in Germany for further study when war broke out. He was forced to take a very convoluted route back to Australia via Argentina, Chile, Panama, USA and Hong Kong in order to join the AIF. According to Mr. Rudd, Rommels’ great strength was his realisation that operating in a desert environment, he could go where he wanted, much like a ship at sea could.
As such, the Allies would often find themselves reacting to what the Germans did rather than the other way around. The Germans even managed to get behind British lines a few times, simply by quickly slipping through holes left in the Allied defense after a feint.
As a result, more than once entire sections of men would find themselves encircled because of these tactics. Raymond Widdows from Moonee Ponds, Victoria, for example, remembers that the entire 28th battalion was lost because the Germans moved so quickly. The Afrika Korps hit so hard and so decisively that reinforcements simply could not get to the troops in time and they were all captured.
Mr. Toovey was one of the men captured that day: his force had been sent out to capture a position called Ruin Ridge. They did so, suffering heavy casualties along the way, but then found themselves surrounded on top of the ridge.
In his words: “[Reinforcements] didn’t come about. The other formations were beaten off and we were in there by ourselves and no extra ammunition or medical support or food or water had come up or could come up. […] So we were there high and dry by ourselves and when we run out of ammunition there was not much we could do anyway.”
The battalion didn’t have to wait long, however, and quickly came under attack from the German tanks. Seeing the situation was hopeless, without ammunition or communications and no relief in sight, the commander surrendered. Mr. Toovey would spend the rest of the war in a prisoner-of-war camp.
Signaling Distress
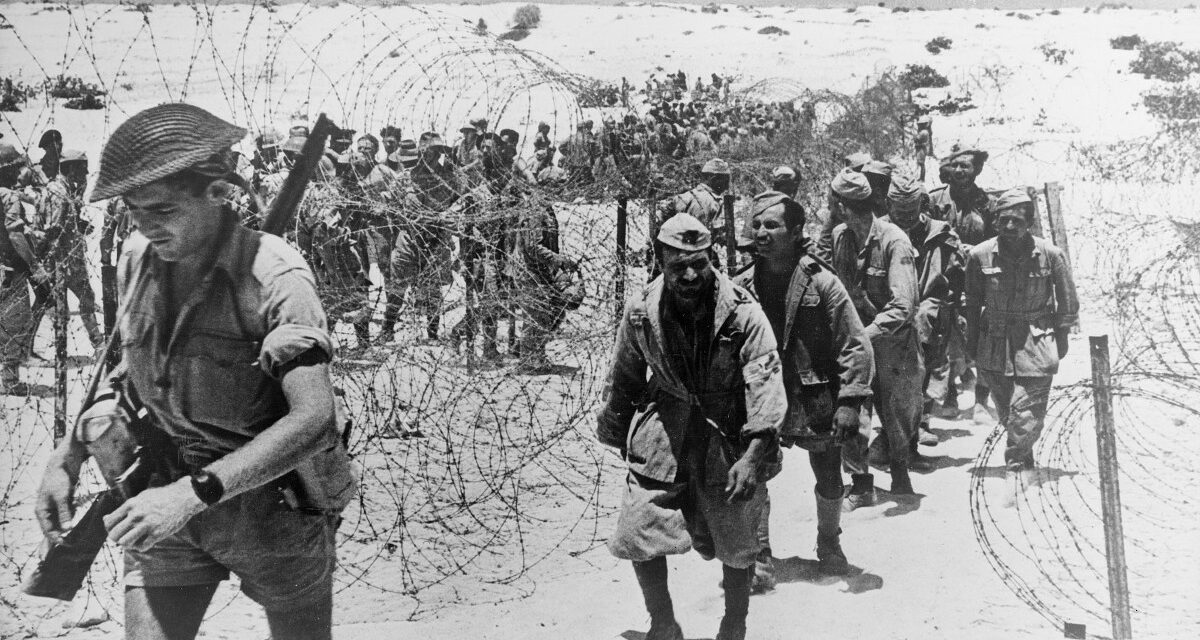
It wasn’t just the Germans who took prisoners, though: Mr. Widdows also recalls that at one point the British High Command decided on a push near Tel el Eisa, just west of El Alamein. An Australian brigade managed to rout the Italians entrenched there and also captured a Germans signals group.
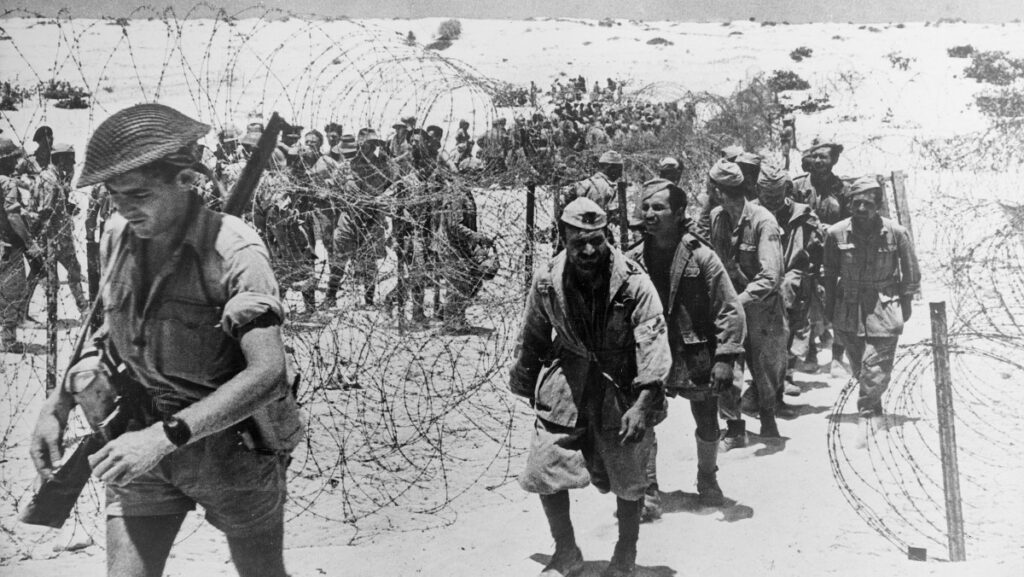
Best of all, the Australians managed to get to them before they burned their code books, which ended up being a huge blow to Rommel as this group had been monitoring British communications closely. Losing them meant that he could move less freely around the desert, something that would come back to haunt him a few months later when the Allies made their push.
On the Defensive
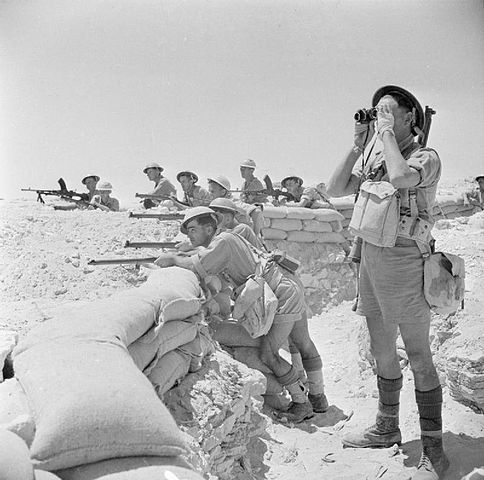
For most Australian soldiers, though, the first battle of El Alamein was one where they waited for the other side to do something. Keith Read from Swan Hill, Victoria, for one, remembers that a lot of his time was spent guarding tank traps, a hole dug into the sand in which a tank would fall when passing over. Surrounding soldiers would then fire on the hapless tank and the crew making their way out of it. Though it sounds efficient, manning a tank trap was a dangerous business.
In Mr. Read’s words, guarding a tank trap meant “standing out like dogs’ balls” as the soldiers would have to stand on the lip above it, at the ready for when a tank would blunder in. As such, he was happy when after a few hours of standing sentinel the call would come to move forward — never back, though “no matter what happens you don’t go backwards, you stay.”
Beginning of the End
Eventually, after almost a month of heavy fighting all around the El Alamein area, grit like Mr. Read’s won out and Rommel went back to his own lines, his forces and energy spent. Thousands had lost their lives fighting in the desert, but neither side had booked any real progress.
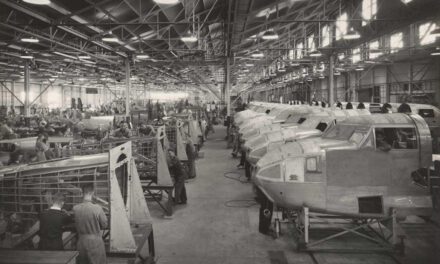
While the Germans and Italians may have seen their plans to take Egypt foiled, the Allies hadn’t been able to do more than just hold them back. They had, however, won a lot of time, and time was on their side.
Even as Rommel retreated, more and more men and materiel men were rolling off the docks at Alexandria. A few months later, in October 1942, the second battle of El Alamein would start with a new British commander, Bernard Montgomery, who was keen to take the fight to the enemy. When the time came, Australian troops would be there right alongside him.
This project commemorating the service by Victorians in the Mediterranean theatre of WW2 was supported by the Victorian Government and the Victorian Veterans Council. Sign up to the newsletter at the bottom of the page to be notified when the next article in this project is released.
Articles you may also like
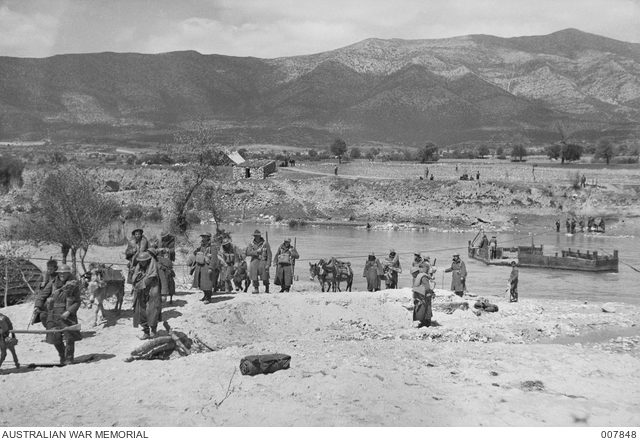
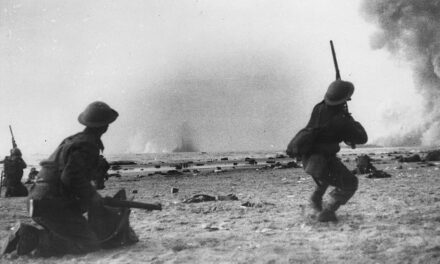
The Battle of Greece – Australia’s Textbook Rear-Guard Action
Retreat doesn’t always mean defeat, sometimes it can be a victory to withdraw in good order and deny your enemy a total victory. This is was the outcome for the allied forces in Greece during April 1941, thanks in part to textbook rear-guard actions fought by Australian units, which allowed 50,732 men to escape the grasp of the advancing superior Axis force. But why were Australian units involved in Greece in the first place?
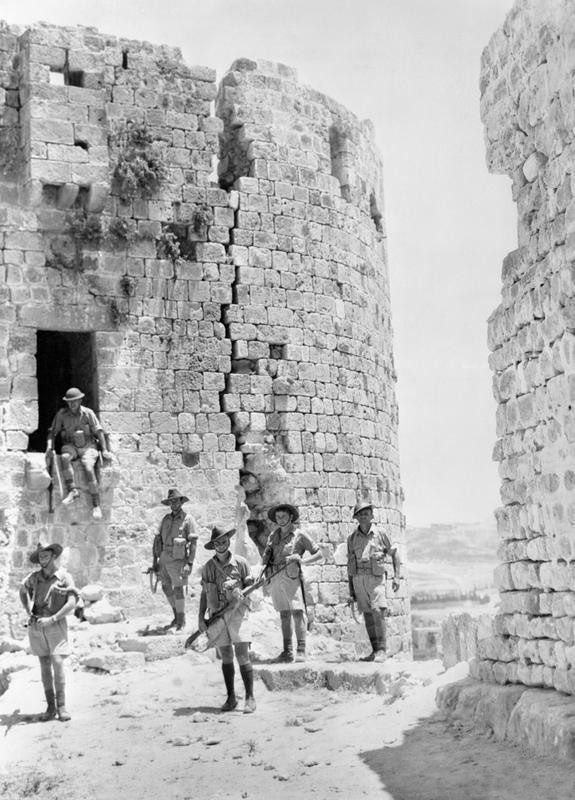
Australia’s War with France
Reading time: 12 minutes
The Nahr al-Kalb, or ‘Dog River’, meets the Mediterranean Sea just north of Beirut, after meandering thirty kilometres downstream from its wellspring in the Lebanon range. A four-lane highway overpass runs along this stretch of coast, and tentacles of concrete obscure the river mouth. The strip of land to the north and south has been reclaimed from the sea. It’s a flat, featureless stretch of windblown sand and garbage. In ancient times, though, the view was very different. The steep riverbanks dropped straight into the ocean, and the Lycus, as the river was then known, was a significant obstacle to conquering armies.
The Benghazi Handicap and the Siege of Tobruk
The Benghazi handicap is the name Australian soldiers gave to their race to stay ahead of the German Afrika Korps in Libya, 1941. They won the race, but the reward was just to be besieged in the city of Tobruk for 241 days, the longest siege in British military history. In this article, we use the words of veterans themselves to describe these events, and how the Rats of Tobruk experienced the siege.
The text of this article was commissioned by History Guild as part of our work to improve historical literacy. If you would like to reproduce it please get in touch via this form.