Reading time: 13 minutes
The First World War came to an end just over 100 years ago, a mere moment’s time in human history. But as close as we are to it, a century is more than enough to surround that conflict with myth and misconception.
The image of the war on the Western Front, as brought to us through decades of outdated scholarship and popular fiction, is simple: two vast armies, each equipped with the latest murderous fruits of the industrial age, found they couldn’t decisively defeat one another in the field and so settled into a long, bloody, dirty, and consumptive war in which thousands of lives were thrown away every day, often for minuscule gains which would bring neither side meaningfully closer to victory.
By Morgan W. R. Dunn
After the first few weeks of mobility, the gruesome stalemate into which the Central Powers and the Allies became locked would be typified for years by massive assaults involving hundreds of thousands of men, most doomed to gain only a few miles of territory or even mere metres. These offensives were later lampooned by the title character in the popular television series Blackadder Goes Forth as Field Marshal Haig’s “gargantuan attempt[s] to move [his] drinks cabinet six inches closer to Berlin.”
The real story is more complicated. By 1916, it was plain to see that tactics like those championed by Haig, designed to draw out the enemy for a momentous set-piece battle, weren’t working, and even those neck-deep in the fight didn’t need the benefit of hindsight to recognise that.
Masterminds of the Trenches
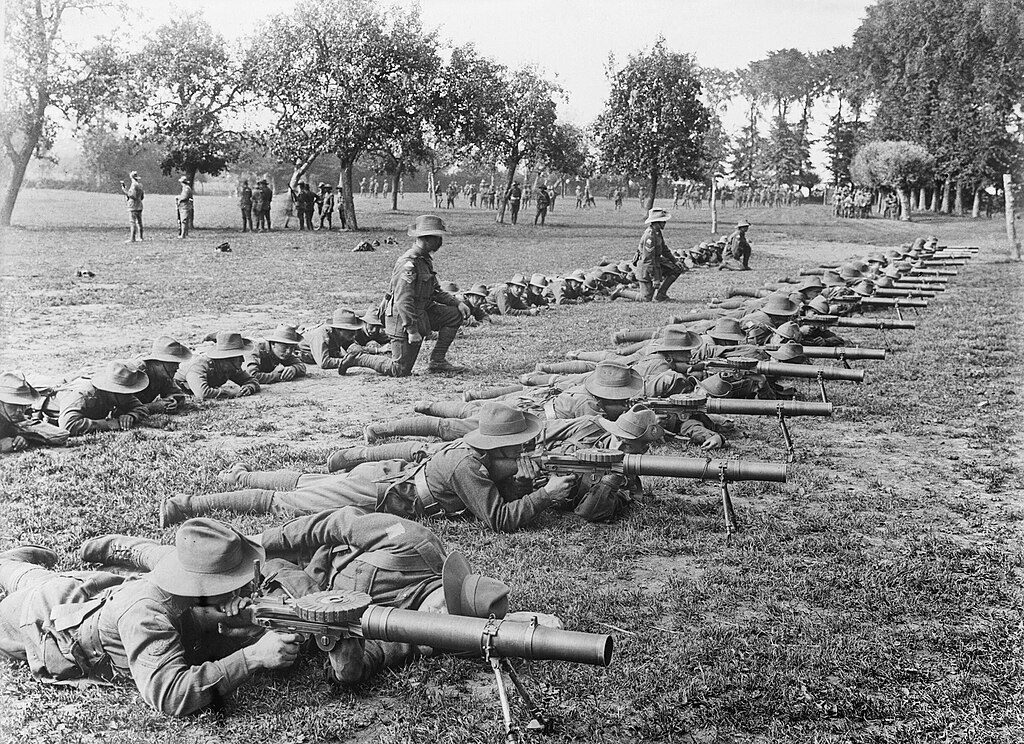
The generals who led the Allies of World War I had learned their craft over decades, and by 1914 they were highly proficient. That may have been enough if the Western Front had been a small colonial war, but it was quickly discovered that what they had learned was woefully inappropriate for the trenches of Belgium and France.
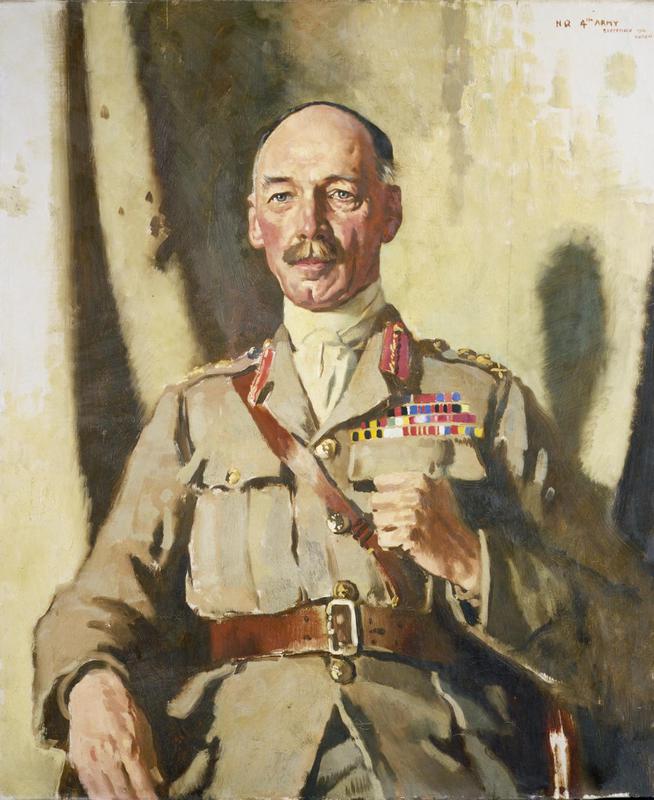
Field Marshal Douglas Haig personified this type of skilled but set-in-his-ways commander. Once the centrepiece of the “lions led by donkeys” trope which characterised mid- to late 20th century WWI history, more recent scholarship has challenged the idea of Haig as an ossified, bloody, and incompetent general. Nonetheless, many of the mistakes made up to 1916 can be laid at his feet and those of strategists like him.
For Haig and several generations of military men before him, the aim of war was to catch an enemy army in the field and destroy its ability to fight in one grand battle. For a century, this had been sound theory: it was precisely how victories were won in the French Revolutionary and Napoleonic Wars, conflicts which cast a long shadow over strategic thinking.
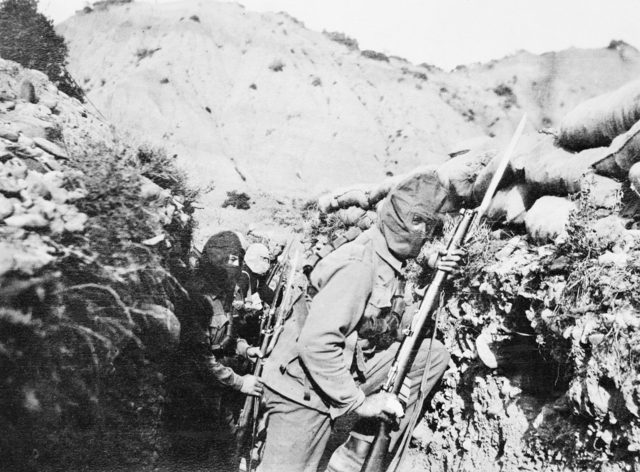
But, in spite of the stereotype of these earlier conflicts consisting of set-piece battles in which often saw massed rows of men firing into each other, a crucial ingredient in Napoleonic-style warfare was missing: movement. Breaking the deadlock, writes military historian Dr. David Martin, “required of troops that they rise from their trenches and cross No Man’s Land, then occupy their enemy’s defensive positions. The crucial phase of the operation was when the attackers exposed themselves to hostile fire as they crossed the 400 metres or so of open terrain that separated them from the enemy.”
For Haig, who believed that “that the fundamental factors in warfare were high morale and the offensive spirit,” it was plain that these were the missing qualities when his attempts to batter German forces into defeat head-on repeatedly failed. But a subordinate, Lieutenant General Sir Henry Rawlinson, commander of the British Army’s IV Corps, saw it differently.
“Bite and Hold”: Rawlinson’s Solution
Some innovations had been made under Haig and the other leading Allied generals: the “creeping barrage,” a slowly-advancing curtain of artillery fire intended to suppress defenders and clear the way for large infantry assaults, had yielded some success in the first two years of trench warfare.
But this tactic was often overused, and misused, particularly in instances where Allied troops struggled to keep up with the barrage and as German troops adapted by digging deeper defensive structures, stringing thickets of barbed wire across their lines, and learning to anticipate Franco-British bombardments. Moreover, commanders paid little attention to counter-battery fire, the use of some guns to knock out enemy artillery to dampen counterattacks. The result, frequently, was that in battles where Allied troops managed to reach the German trenches, they just as often had to give them up in the face of withering machine gun and artillery counterfire and fresh German infantry pouring out of well-protected bunkers and trenches.
“It does not appear to me,” Rawlinson noted in his diary in 1915, “that the gain of 2 or 3 more kilometres of ground is of much consequence, or that the existing situation is so urgent as to demand that we should incur very heavy losses in order to draw a large number of German reserves against this portion of our front.” His solution was simple but effective: well-armed, well-supported infantry would seize and hold German positions individually, ensuring they had the time, equipment, and numbers to secure the captured position before moving onto the next one in what Rawlinson called “bite and hold” tactics. It was less dramatic and slower than the traditionalists’ preference for decisive battles, but that preference was being proved outdated with each passing day in the trenches.
Australian War Memorial
“I daresay I shall have a tussle with [Haig] over the limited objective,” Rawlinson wrote, “for I hear he is inclined to favour the unlimited with the chance of breaking the German line.” “Tussle” was an understatement: old-fashioned methods would fail again and again, reaching a high pitch at the first Battle of the Somme. Rawlinson urged Haig to try his bite-and-hold ideas here, but as the field marshal wrote in his diary,
“Sir H. Rawlinson’s … intention is merely to take the enemy’s first and second system of trenches and “kill Germans” … I think we can do better than this by aiming at getting as large a combined force of French and British across the Somme and fighting the enemy in the open!”
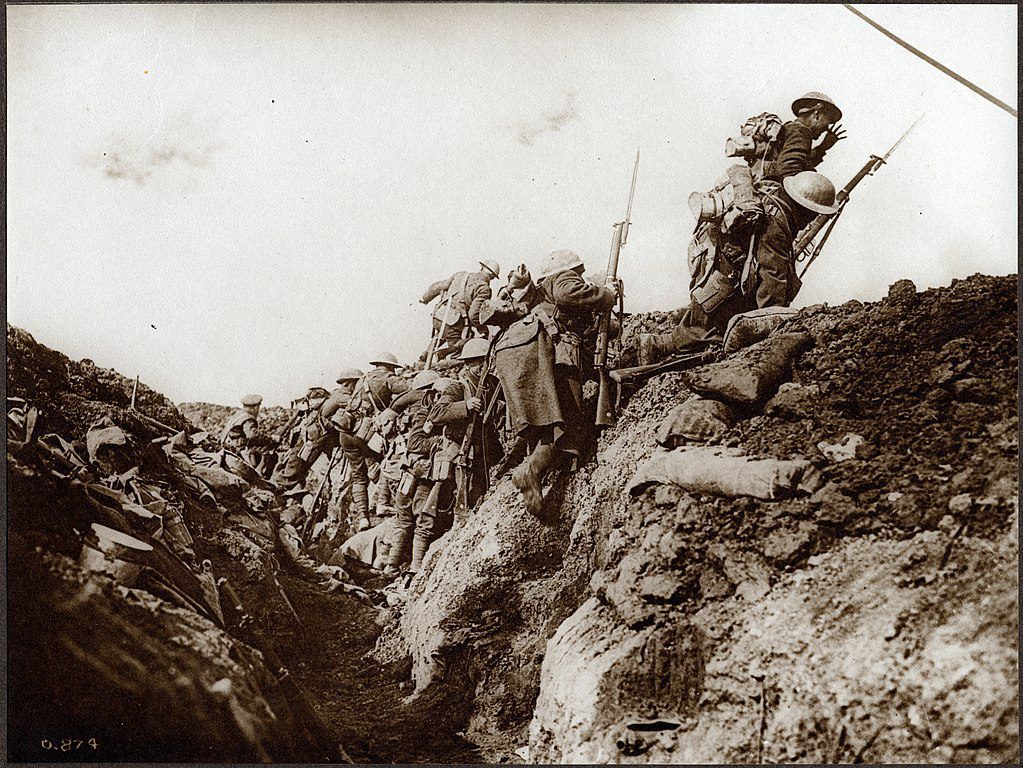
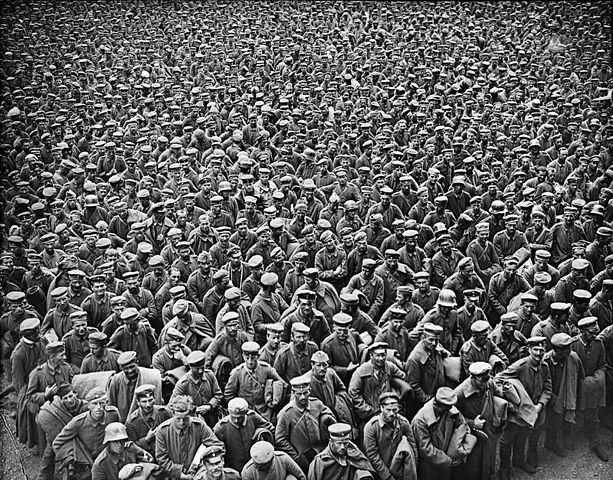
Of the hundreds of guns designated for the attack, only 90 were set aside for counter-battery fire. The rest were given targets over too wide an area to be effective, and Haig paid too little attention to the flanks that would form on either side of his 14 attacking divisions. On the first day of the Somme Offensive, the attackers would sustain 60,000 casualties, mostly from German artillery and machine gun fire.
In total, French and British forces absorbed over 620,000 casualties to the Germans’ 440,000, all without achieving the decisive battlefield victory Haig had hoped for. More worryingly, a growing number of soldiers were becoming fed up with his methods. In 1917, the wind would finally begin to change.
1917: Overflowing Trenches
The tactics which had been tried, again and again, with no lasting result other than mountains of spent ammunition and thousands of spent lives, would get one final moment in the sun in 1917. That year saw France appoint a new commander-in-chief, the relatively junior Robert Nivelle, the victor of Verdun. Nivelle drew up yet another plan to force a decisive engagement, this time focusing on the Aisne River sector in northeastern France. A relatively quiet segment of the front since 1914, Nivelle’s plan called for large diversionary attacks to spread the Germans thin while a French force would punch through the stretched line and achieve the hoped-for knockout.
While there were limited successes, such as the Canadian victory at Vimy Ridge, French casualties reached such gruesome heights that their advance was bogged down by their own medical corps retrieving the dead and wounded. The carnage inflicted for too little reward, backed by two years of failed bloody offensives, prompted thousands of French troops to desert and more to mutiny.
Another attempt at grand battle was made at Passchendaele in late 1917, again under Haig’s direction and again with disappointing results.
The war drew into the summer of 1918, and while each engagement saw the Germans a little wearier, and more surrendering, the end was still not in sight. But the United States had entered the war, sending 500,000 men to match the $7,000,000,000 it had loaned to the Allies. War-weary but encouraged French and British troops began to gain ground against the last-gasp German Spring Offensive.
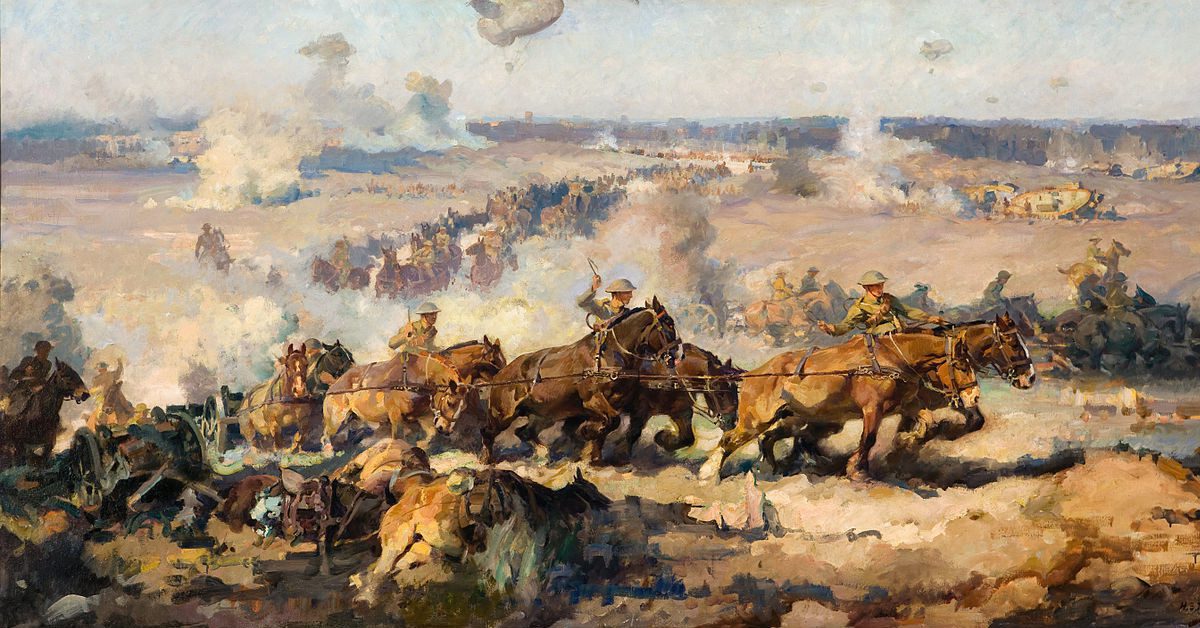
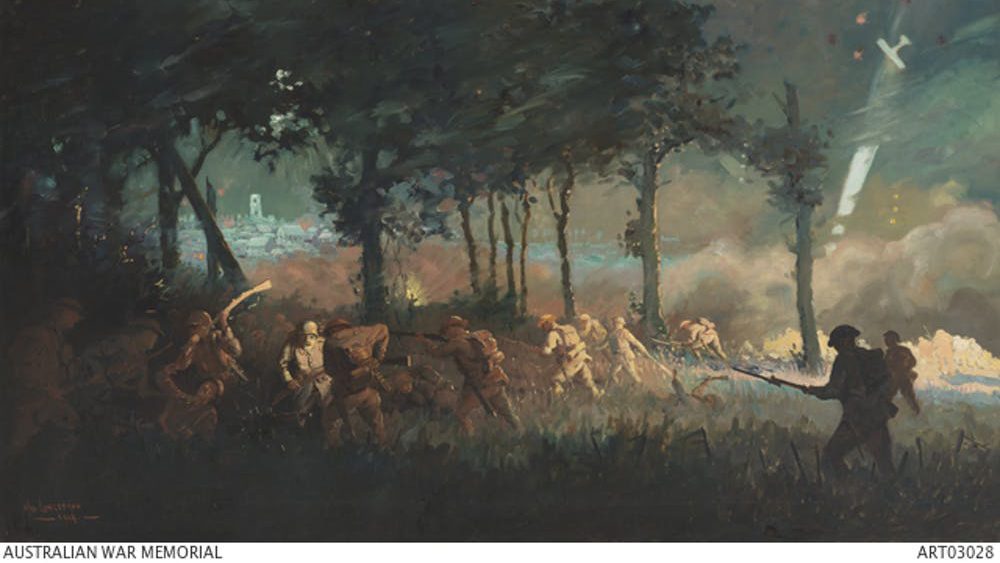
The Australian Corps at the Battle of Amiens
Haig’s old technique would then finally meet its end. Following an Allied victory at Soissons in July 1918, John Monash, commander of the Australian Corps, found himself on newly-won territory in Picardy. There, his troops pioneered a tactic known as “peaceful penetration,” in which raiding forces would capture prisoners, reconnoitre German lines, and seize their outer perimeter to gain ground.
The effectiveness of this tactic was a testament to the Germans’ waning strength. The German commander, Erich Ludendorff, hoped to capture the town of Amiens on the Somme River in an effort to threaten a vital rail link to Paris and stay on the offensive. Monash saw that the firm ground near the town would be ideal terrain for a revolutionary resource to achieve the element of surprise: tanks
On 8 August, more than 100,000 men, their presence undetected, lunged toward the German lines supported by 2,000 guns, 2,000 aircraft, and nearly 600 British, Australian, and Canadian tanks. Ludendorff’s 20,000 defenders – “depressed down to Hell,” in his words – were spread thin in small squads or machine gun emplacements – ideal for fending off waves of unsupported infantry, but prey for a well-coordinated combined arms force.
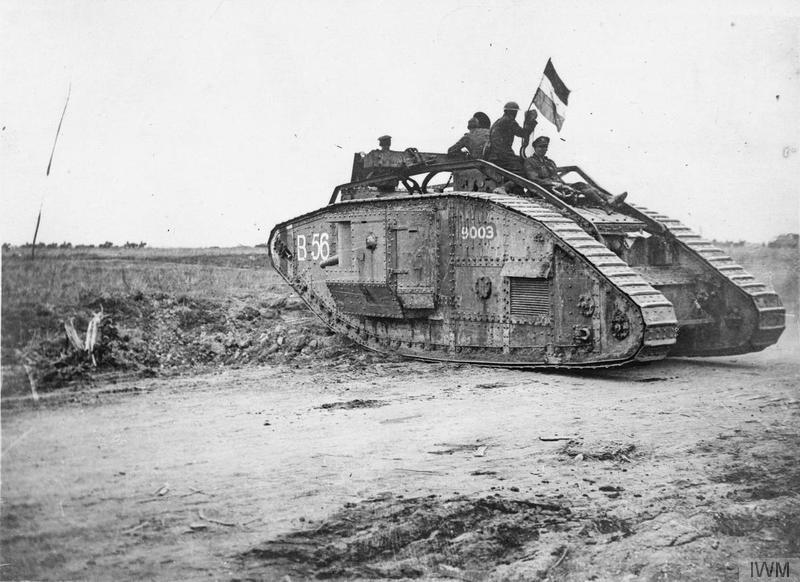
Fast-moving, tough, and experienced Canadian and Australian troops, many of whom were healthier and reared in tougher climes than the city-born men of the British Army, overran a 20-kilometre stretch of the German defensive line. Command was devolved down to the battalion level, allowing flexible frontline units to seize objectives and fresh reserves to leapfrog ahead of them and make good the gains.
“‘It was like the old open warfare we used to read about’, a Canadian battalion commander noted.” Mobility had finally been restored.
British Pathé
By the end of the first day of the battle, 27,500 Germans were missing or had been taken prisoner and over 12,000 killed and wounded. 400 German guns had been captured or destroyed, the 2nd and 18th Armies had been thrown onto their back feet. Ludendorff later called it “the black day of the German Army.” Crown Prince Rupprecht wailed that “The miserable fact that our troops are doing so badly can be variously attributed to: exhaustion, their inferior organization … and despondency over events.”
Elusive Victory Captured
Amiens was the opening battle of the Hundred Days Offensive, the Allies’ last push to topple the German Army. The attack had succeeded, but lost steam within two days. Still, the commander of French forces in the battle, Ferdinand Foch, wanted to push on. Had he led a purely French force, he may have done so, but concerned Imperial commanders resisted.
Currie felt a further attack would be “a rather desperate enterprise and [anticipated] heavy casualties.” Amiens was clear proof that bite-and-hold could win victories. Unwilling to squander the advantage by a return to the old methods, an “almost insubordinate” Rawlinson finally convinced Haig not to support Foch’s proposal on 14 August; the field marshal agreed “without a murmur.”
As summer cooled to autumn, British and Imperial forces would employ bite-and-hold tactics throughout northeastern France and Belgium. By redeploying troops to other sectors when they encountered firm resistance, they were able to preserve their strength while wearing the demoralised and exhausted Germans down.
By November, Germany’s allies had surrendered, and Rawlinson’s ideas, enacted through the hands of hardened Canadian and Australian troops with support from fresh American forces, had broken the German front line. Alone and under threat of revolution at home, Kaiser Wilhelm II finally decided Germany had had enough. When news of the German surrender came, battered but determined Imperial forces were still in the field, still using the tactics which had helped them break free of the nightmarish stagnation of the trenches of the Western Front.
Podcast episodes about innovation during WWI
Articles you may also like
General History Quiz 139
1. In the 1930’s which country introduced deliberate errors into its maps in order to confuse potential invaders?
Try the full 10 question quiz.
General History Quiz 176
1. How long did the Berlin Wall stand?
Try the full 10 question quiz.
How the Establishment Resisted the Abolition of Slavery – New Podcast
Historian Michael Taylor discusses the resistance of the British establishment to the ending of the slave trade. A fascinating perspective on how the abolition of slavery was viewed in Britain in the years prior to it occuring. Or you can read the full story of how Britain got the slave owners to agree to abolition […]


The text of this article was commissioned by History Guild as part of our work to improve historical literacy. If you would like to reproduce it please get in touch via this form.

